Uyghur meat bread

Today’s post is a long overdue return to the topic of Uyghur wood fire oven breads. Some day maybe I’ll have an opportunity to build my own tonur تونۇر (or as they are more commonly known in the US, tandoor–see here for an earlier post on the subject of Uyghur tonur breads), but for now I have to approximate the effect by using our gas oven on high heat with a few bursts of steam.

The bread that I’m making today is a type of nan (flatbread), and it contains seasoned chopped mutton throughout the dough. This style of bread is popular between Xinjiang and Uzbekistan, where it is known as göshnan گۆشنان in Uyghur and go’shtli non гўштли нон in Uzbek. Both words mean “meat bread”.

The genre of “meat bread” can contain a few different styles. Today I’ll incorporate the meat mixture into the dough with a coiling technique similar to the method for making scallion pancakes. There are also other ways that “meat bread” are done in Central Asia. Here is a link to one alternative Uzbek method that is more like a bagel-shaped meat pie. Yet another method is even more a pie than bread, with two rolled-out dough layers pinched together. Here is a link to an Uzbek blog with one such example. I have seen pies like this baked, or even fried in a wok in a lot of oil.

Enjoy!

Recipe: Uyghur meat bread göshnan گۆشنان

Basic bread dough (wheat bread flour or all purpose flour, yeast, salt, and water):

I usually make bread or pizza dough with about 2 cups of flour, 3/4 cups water, a tsp of salt and a tsp of yeast. If you have the time to do a preferment, the bread will have a little more flavor. See Peter Reinhart’s books to learn more about preferments and instructions for excellent breads, highly recommended.

Some cooks add egg to the dough as well.

Meat filling:

fatty mutton, finely chopped
finely chopped onion
little cumin
salt, pepper, oil

Mix these ingredients and set aside.

IMG_2918

Roll out your dough after it has rested and developed

IMG_2919

put on your meat and onion mixture (note-I didn’t use onions this time and regret it). top with some oil.

IMG_2922

Roll the dough into a snake

IMG_2924

coil the dough and let rest for at least 20 minutes, or until the dough is again easily manipulated

IMG_2957

flatten dough like you are doing a pizza (i.e. by picking it up and stretching it over your hands. Traditionally this bread is thinner in the center and thicker around the edges. Some cooks puncture the middle area with a fork or other device to ensure the center doesn’t rise. I didn’t punch the center, I don’t mind a little irregular rising.

IMG_2960

Optional: top with some oil or egg wash (I just used oil)

IMG_2963

Bake on high heat until golden. I start breads off at 500 degrees with a few bursts of steam by spraying water on the walls of the oven every 30 seconds for the first 1.5 minutes. After 10 minutes or so I turn the heat down a little bit to 450

IMG_2966

Let the bread rest before tearing into it. This bread is a little flaky, due to the oil in the roll.

Posted in - Recipes, Central Asia/Uyghur food | Tagged , , , , , , , , , | 2 Comments

Uyghur home-style pulled noodles

IMG_2954
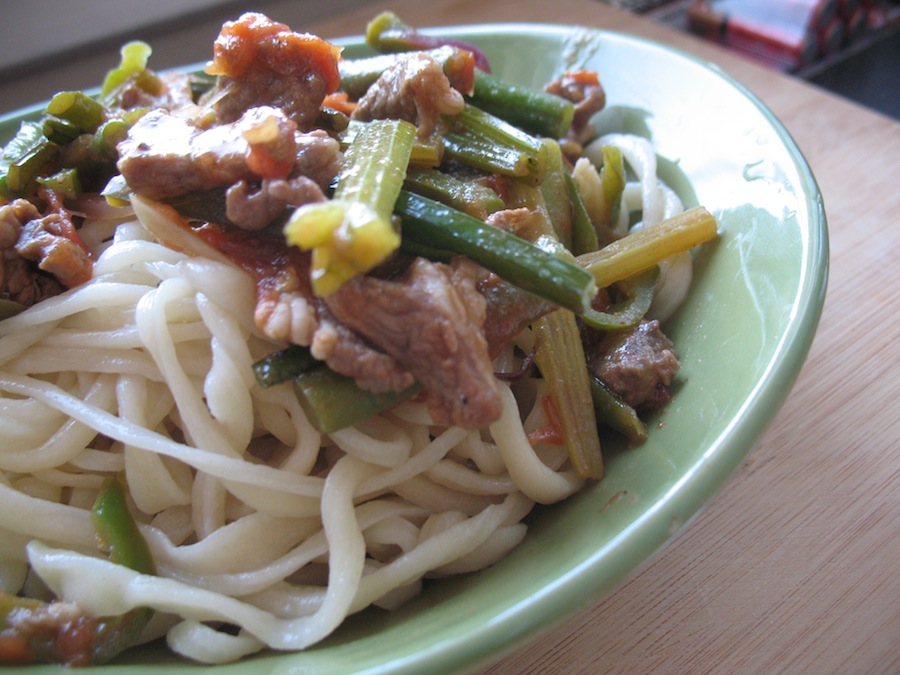
For those of you who have experienced them, Uyghur pulled noodles–known as läghmän لەغمەن or längmän لەڭمەن in Uyghur and banmian 拌面 or latiaozi 拉条子 in Mandarin Chinese–are surely a special treat. Expats in China talk about this dish as “Uyghur spaghetti” due to the similar composition of boiled and drained noodle topped with a meat, garlic, vegetables, and tomatoes. The flavor combination may surprise you, and you undoubtably will crave this like a comfort food after you try it for the first time.

Here in the States längmän is hard to find at restaurants. If you live in New York, you can find this at Kashgar Cafe in Brighton Beach, and in Philadelphia you can sample the Uzbek cousin of this dish at Restaurant Uzbekistan or at Samarkand in Bustleton/Northeastern Philadelphia. Otherwise you need to make it at home, or find a Uyghur friend.

The Uyghur name for this dish is likely derived from a Chinese word, either “cold noodle” liangmian 凉面, or “pulled noodle” lamian 拉面 (see here for a discussion about the name and history on Language Log).

Läghmän is a staple food in Xinjiang, eaten by millions on a daily basis. Beyond Xinjiang, it is well-known in the oasis cities west of broader Central Asia (i.e. in the ‘Stans–where Uyghur chefs are held in high regard due to their skills in preparing this dish), and throughout China in large cities like that have Uyghur or Hui communities.

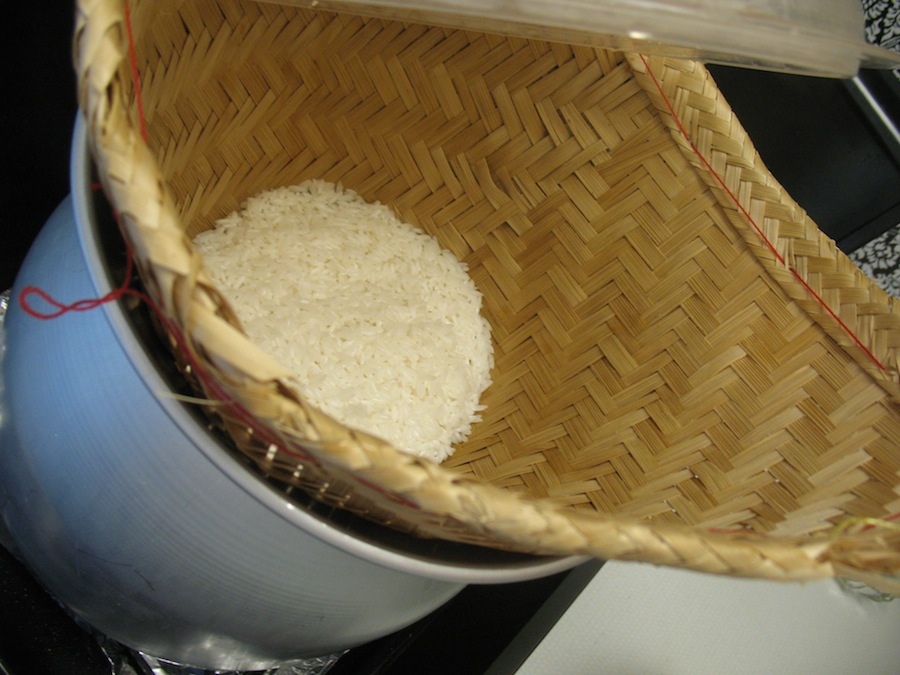
The noodles are a very simple dough of wheat flour, water, and a little salt. Techniques for pulling noodles vary, from methods similar to Lanzhou-style lamian to a simple home coiling method that is relatively easy to learn (see below for images and more info on pulling). Using the coiling method, standard US all-purpose flour can be used successfully.

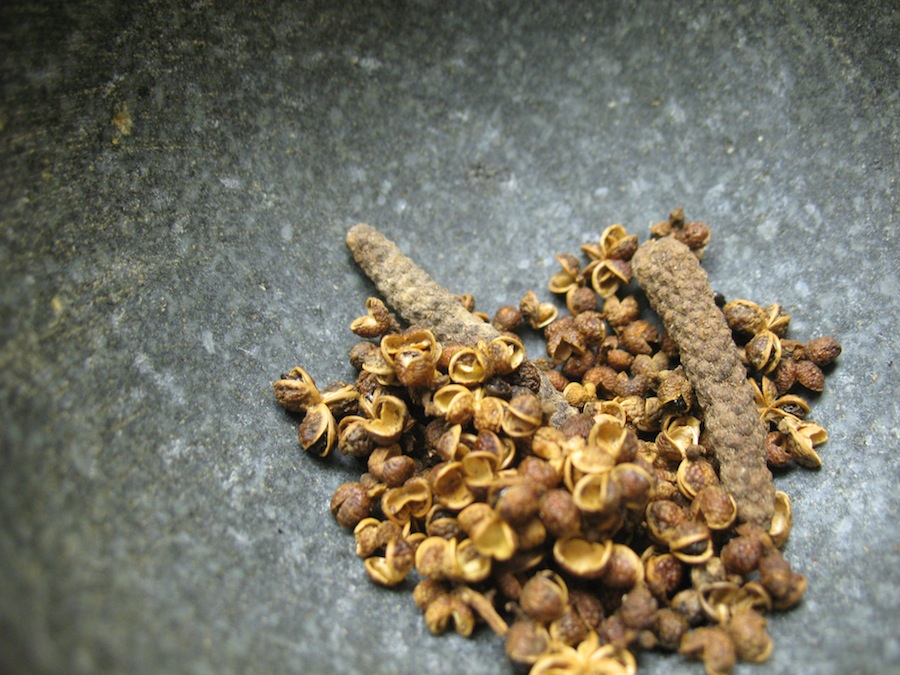
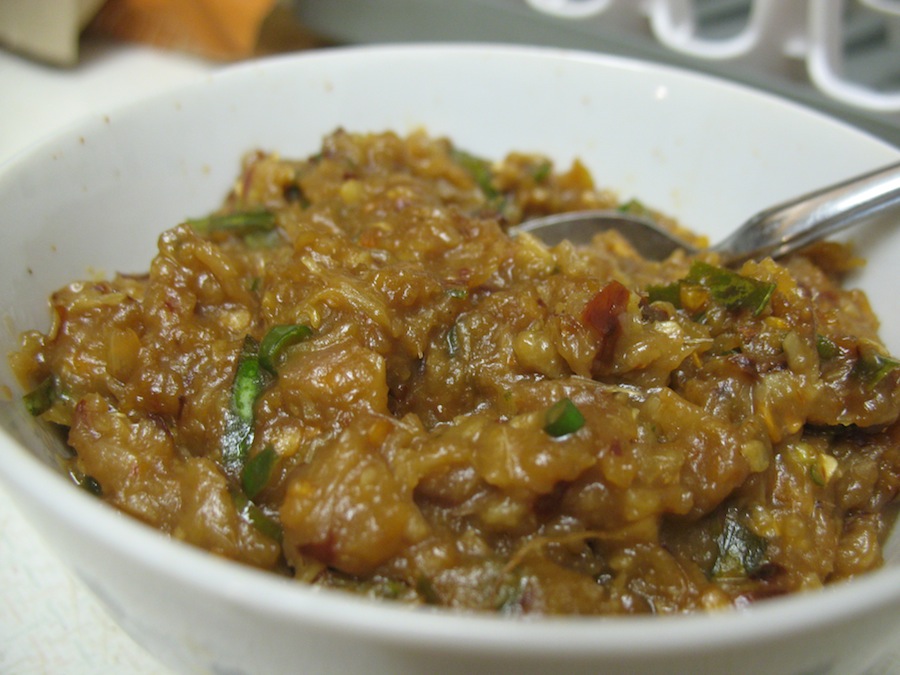
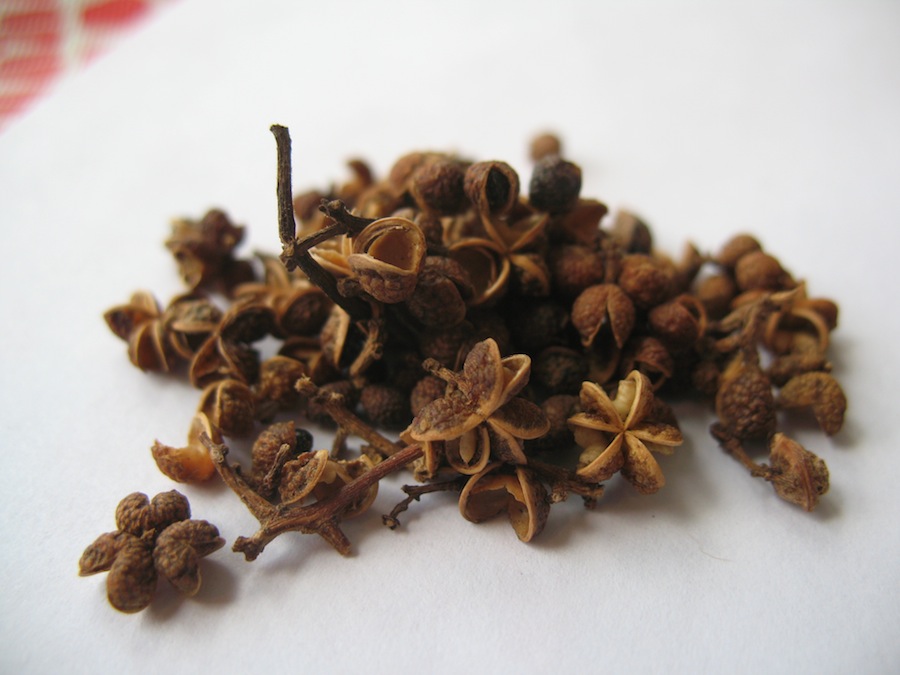
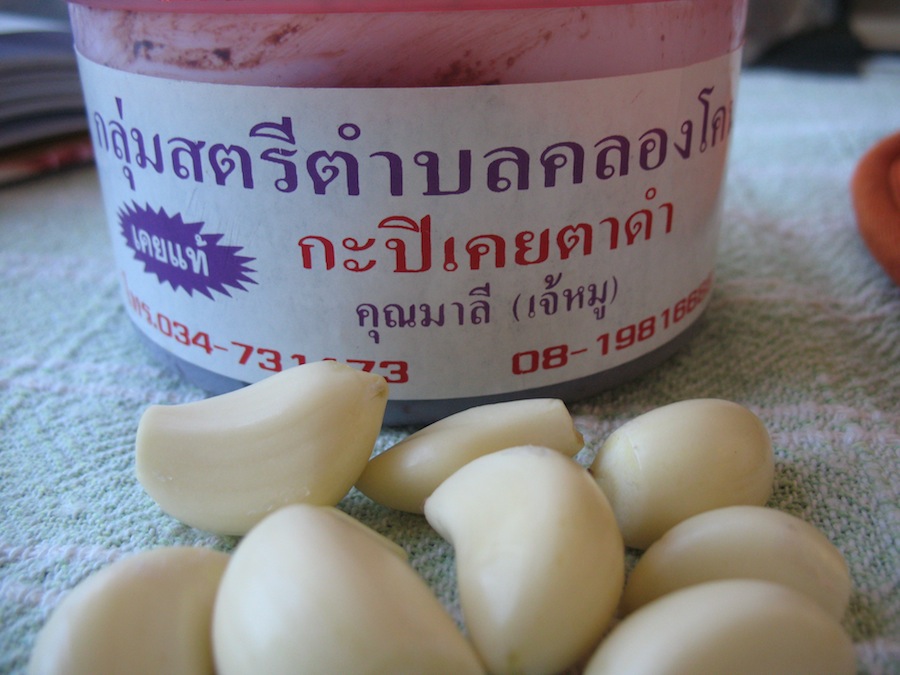
The ingredients for the topping vary greatly depending on what is available or in season. Key flavors that will generally be present from version to version come from the meat (usually mutton), tomato (which is perhaps the most striking difference when comparing to common Chinese meat stir frys), garlic, and black vinegar. Frequent primary ingredients for the topping include: jiucai (garlic chives), long beans, potato, eggplant, long chile peppers, Chinese celery, bokchoy, napa cabbage, onion, green onion. Seasonings generally include salt and pepper, tomato or tomato sauce, garlic, and sometimes soy sauce, black vinegar, cumin, huajiao, and ginger.

There are a few other blogs out there that do a good job of introducing Uyghur pulled noodles. This one at Uyghurbread is a pretty thorough, with some video segments of the blogger’s visiting mother pulling noodles. Close up detail of the “coil technique” can be found in a beautiful video done by Russian blog Talerka. Another nice intro to the dish can be found at Silk Road Chef, along with a läghmän omelet recipe.

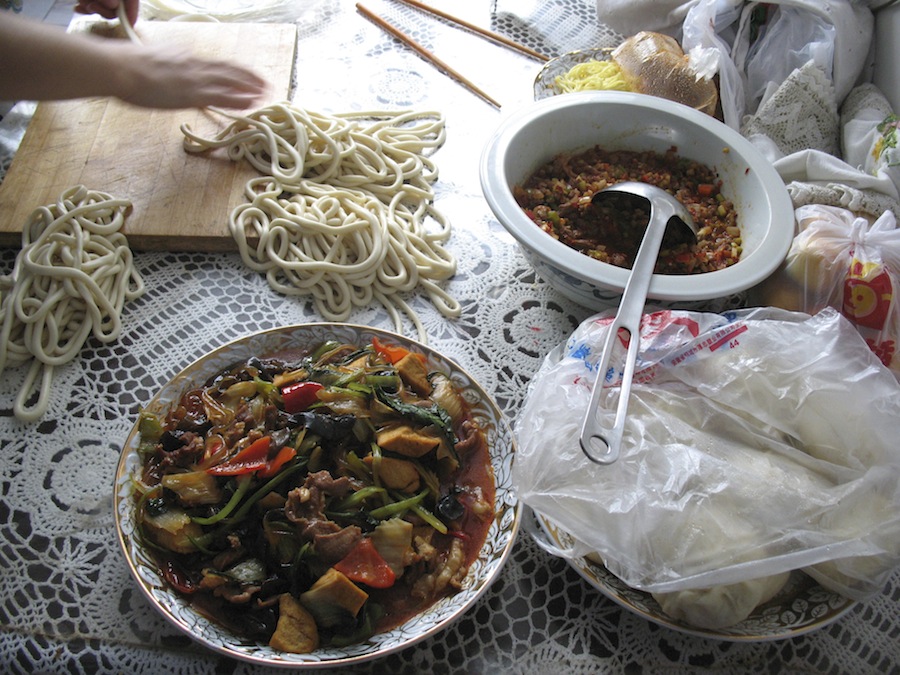
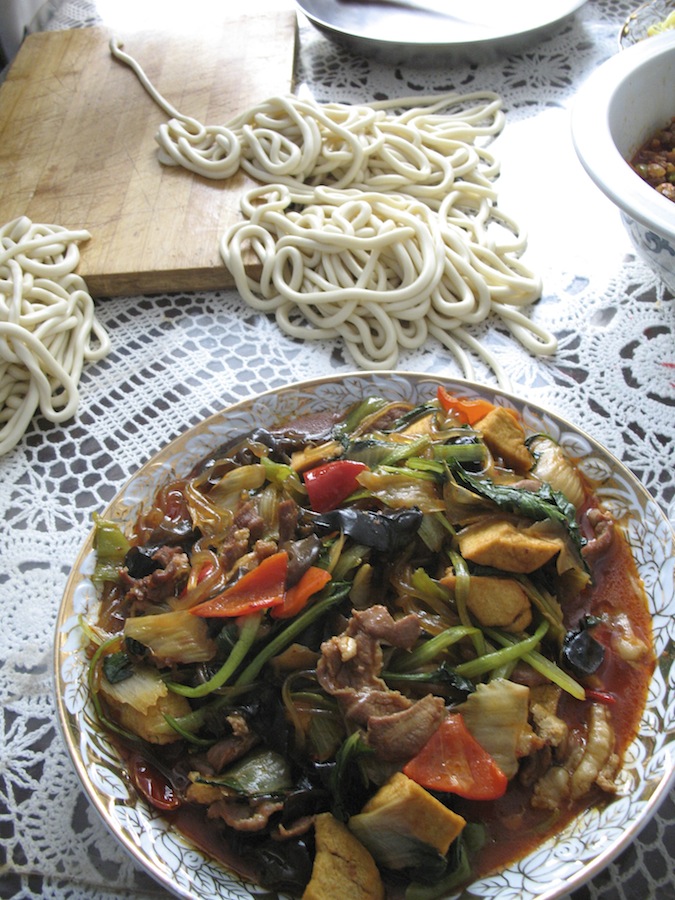
Here are some images from some of my own great läghmän memories in Xinjiang and Ningxia, first from my friend in Urumchi–notice the toppings already prepared, this one with black wood-ear fungus, cellophane noodles, and tofu:

IMG_5244IMG_5248
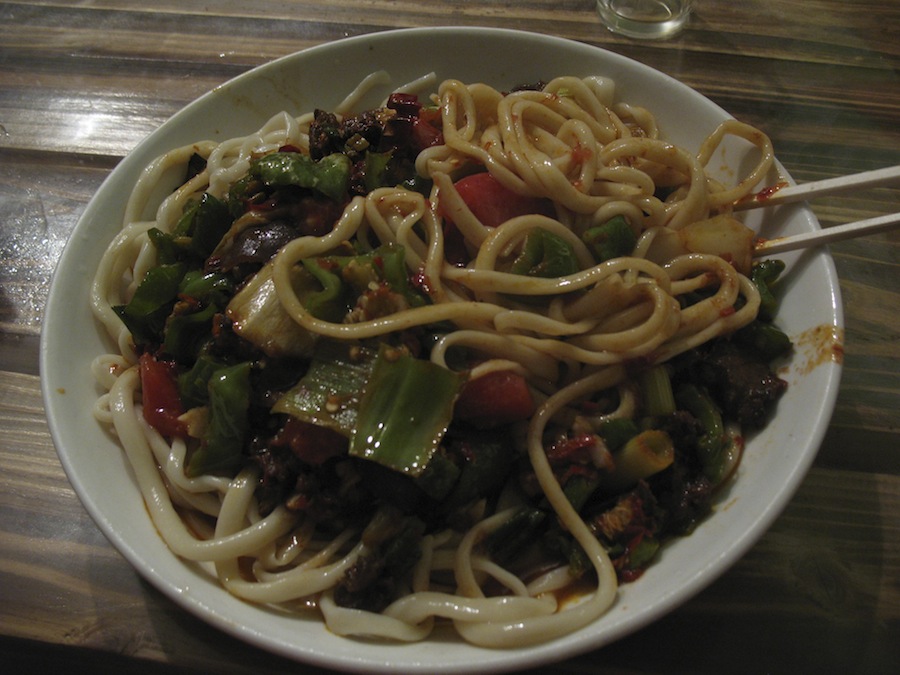
Here is a version from a Hui-run Xinjiang restaurant in Yinchuan’s Oxen Street neighborhood:

IMG_4817

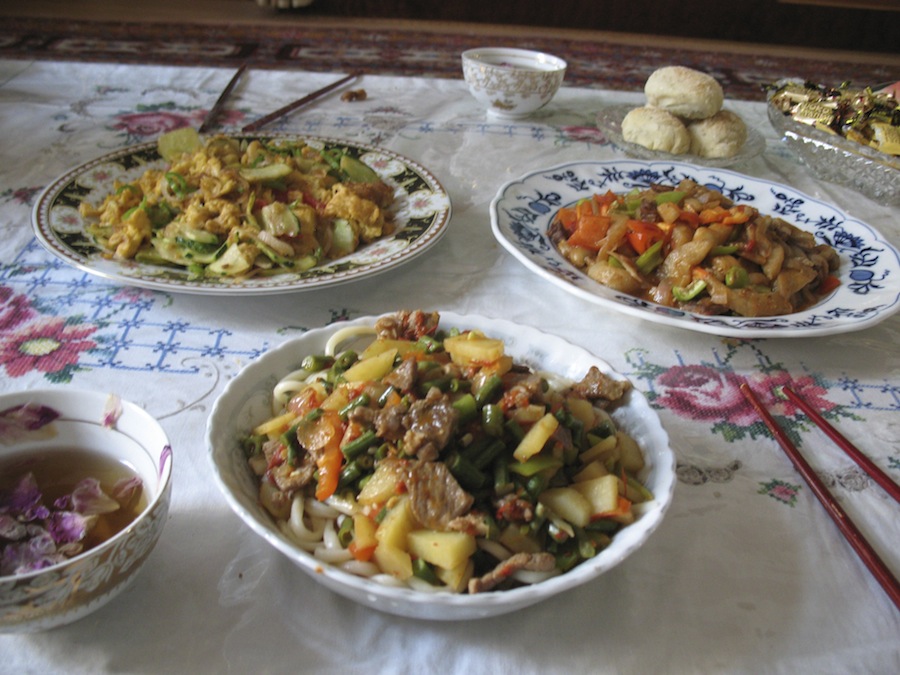
And here is a version with potatoes, beans and carrots at a friend’s place in Ghulja, near the Kazakhstan border–with rose petal tea:

IMG_5465

Recipe: Uyghur home-style pulled noodles ئۆي لەغمىنى

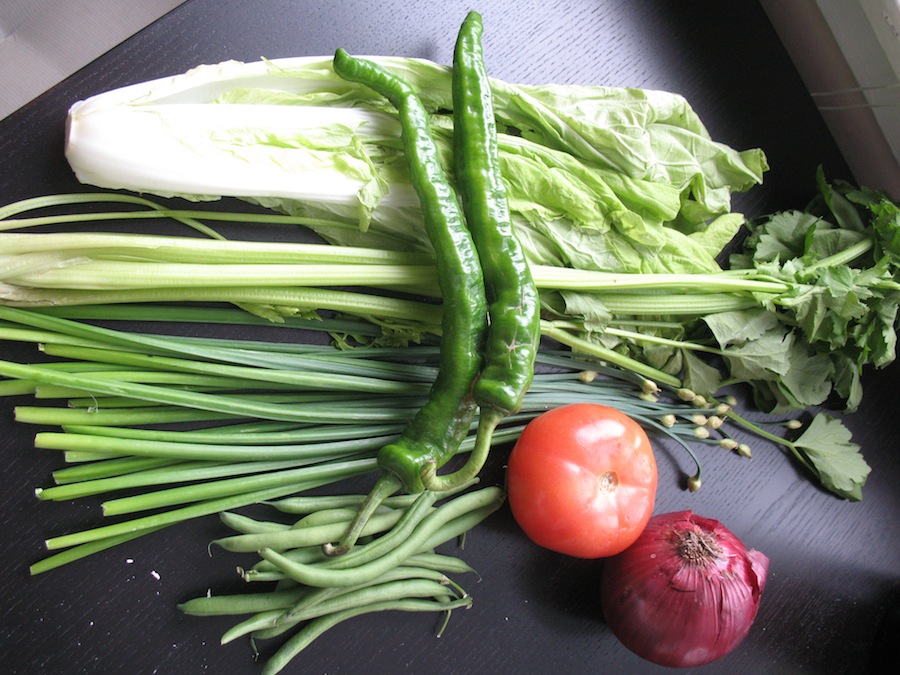
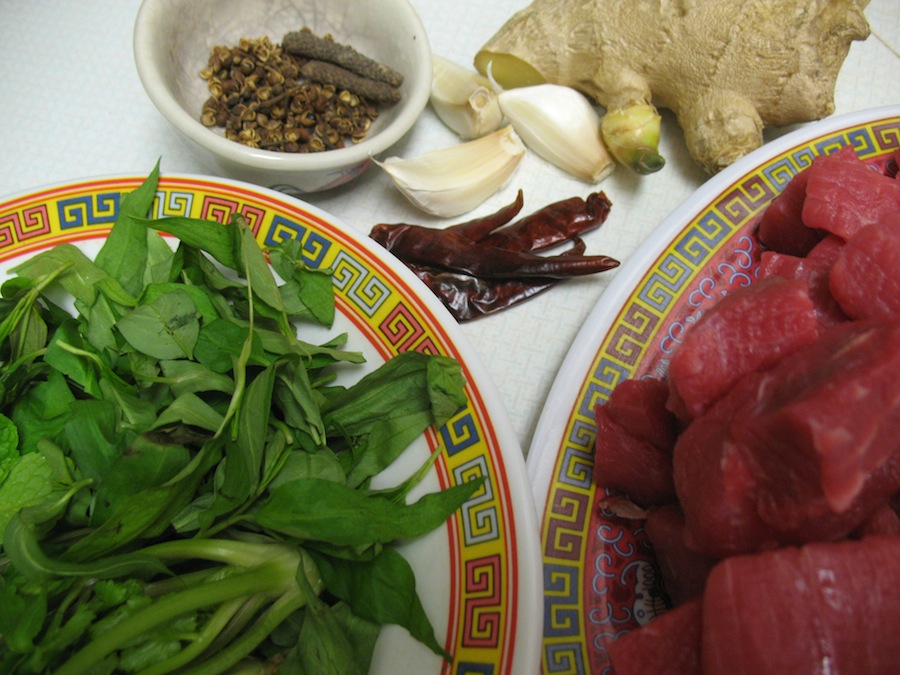
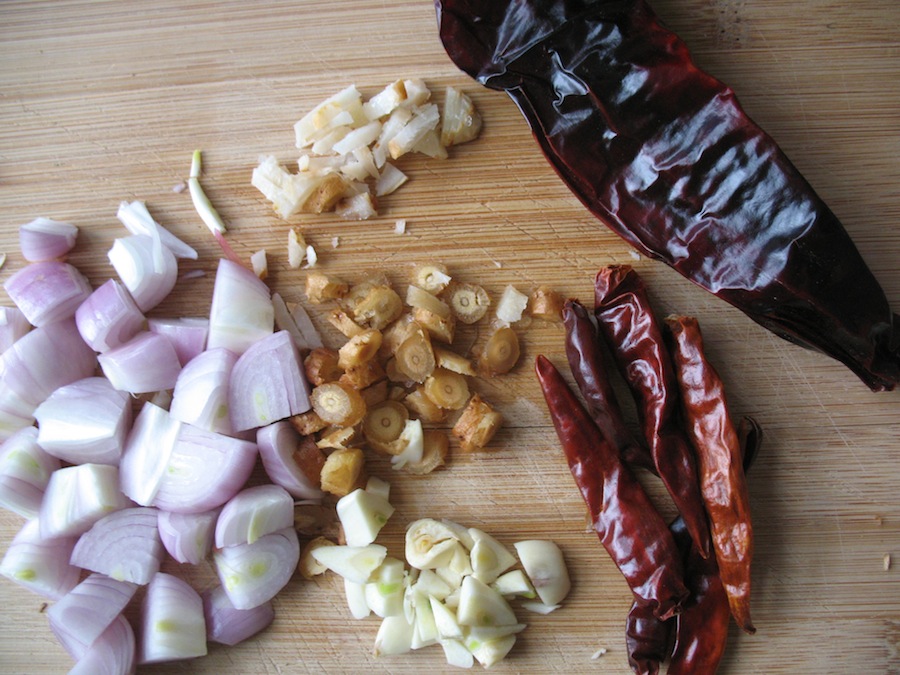
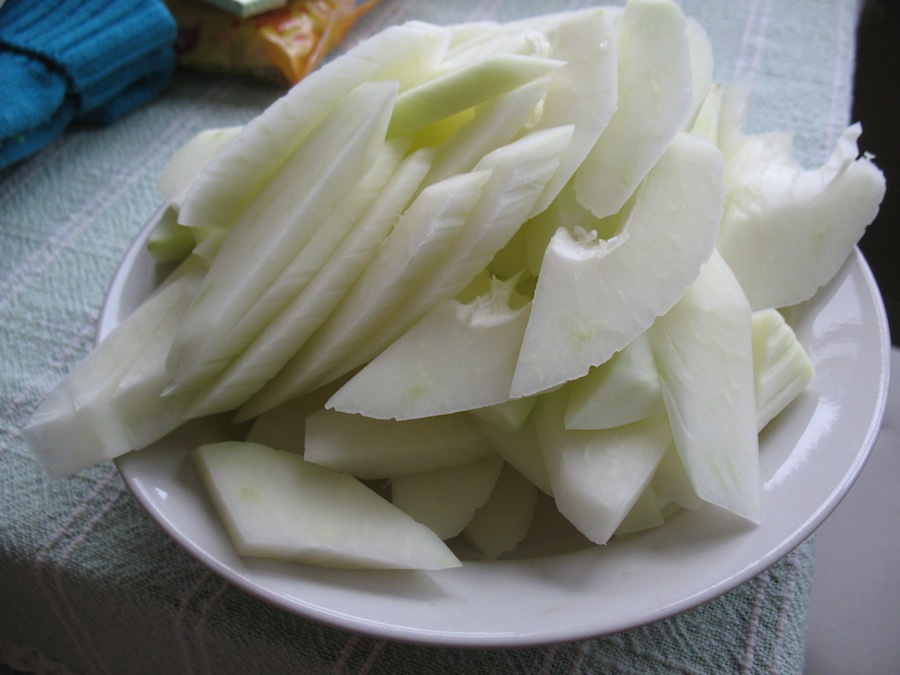
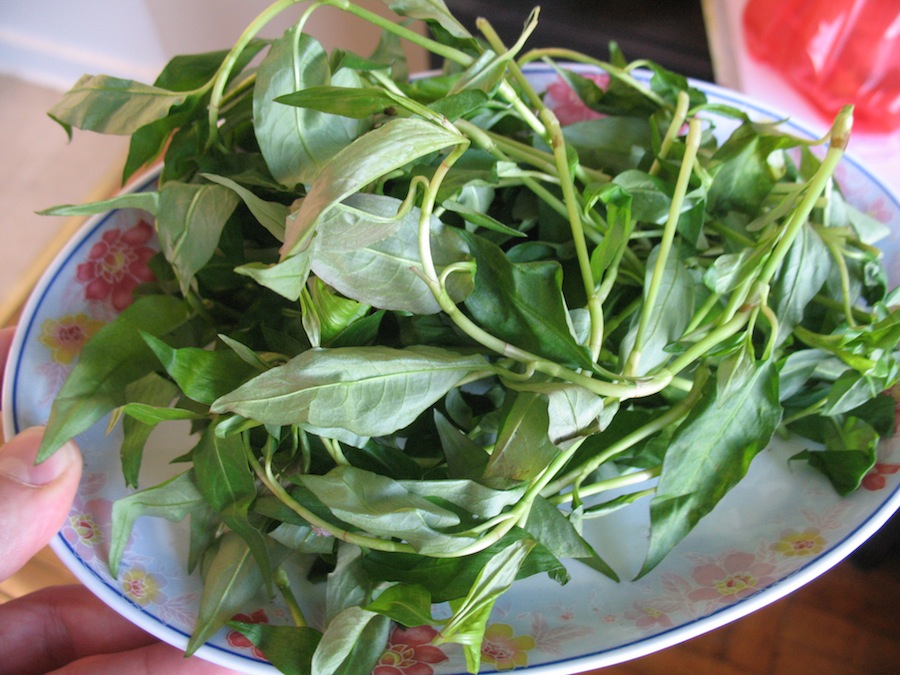
Today I went down to Chinatown to see what looked good for a possible läghmän inclusion. I ended up buying some Taiwan bokchoy, peppers, jiucai, Chinese celery, and green beans:

IMG_2866
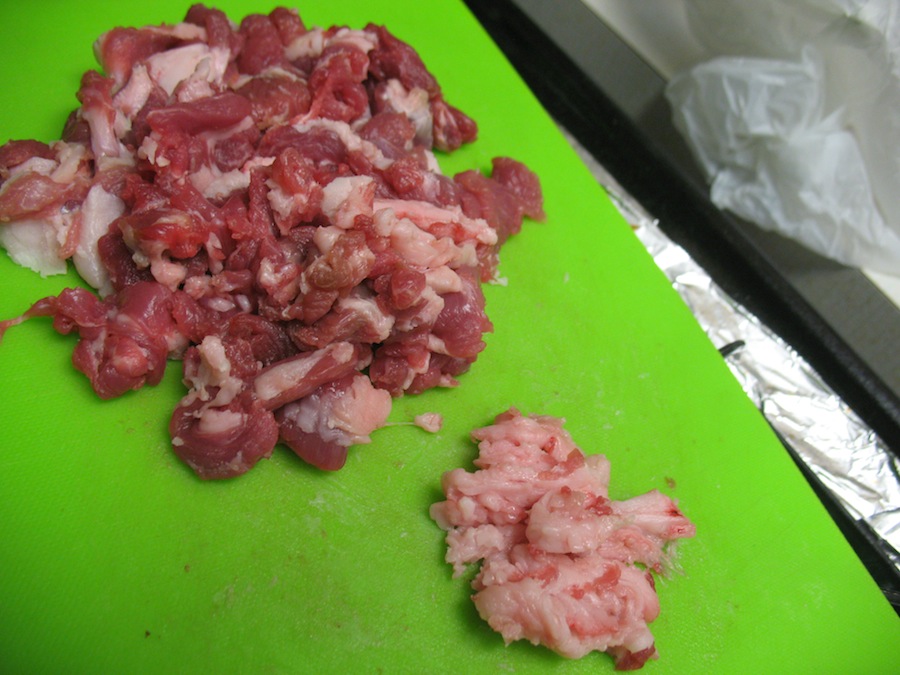
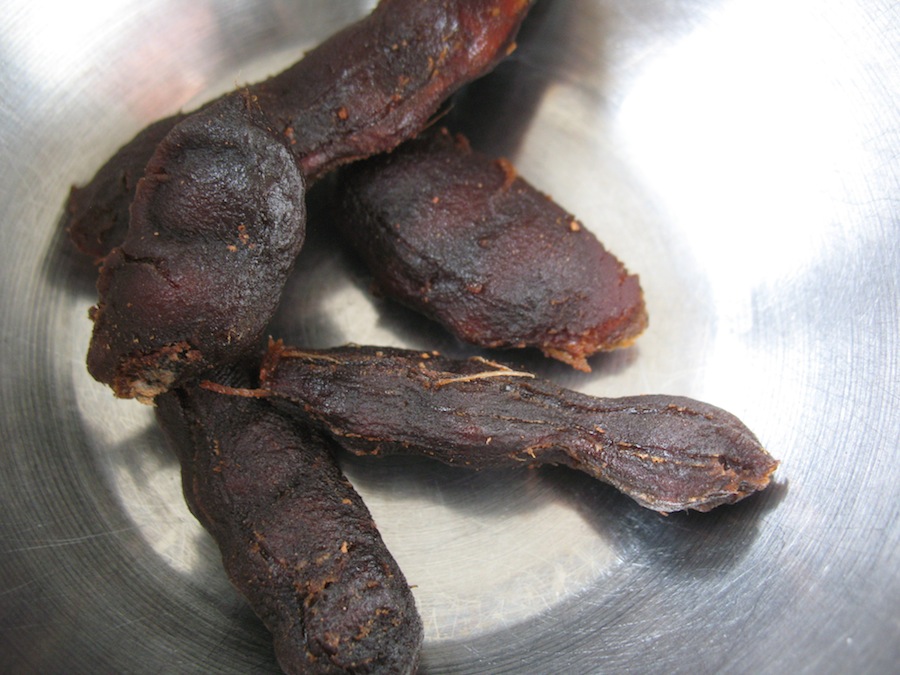
And I got some fatty mutton from Reading Terminal Market:

IMG_2869Pulling noodles. Again, refer to the videos previously mentioned for a good sense of how these noodles are done. The dough is incredibly simple, especially compared to the planning and consideration that go into alkaline noodles.

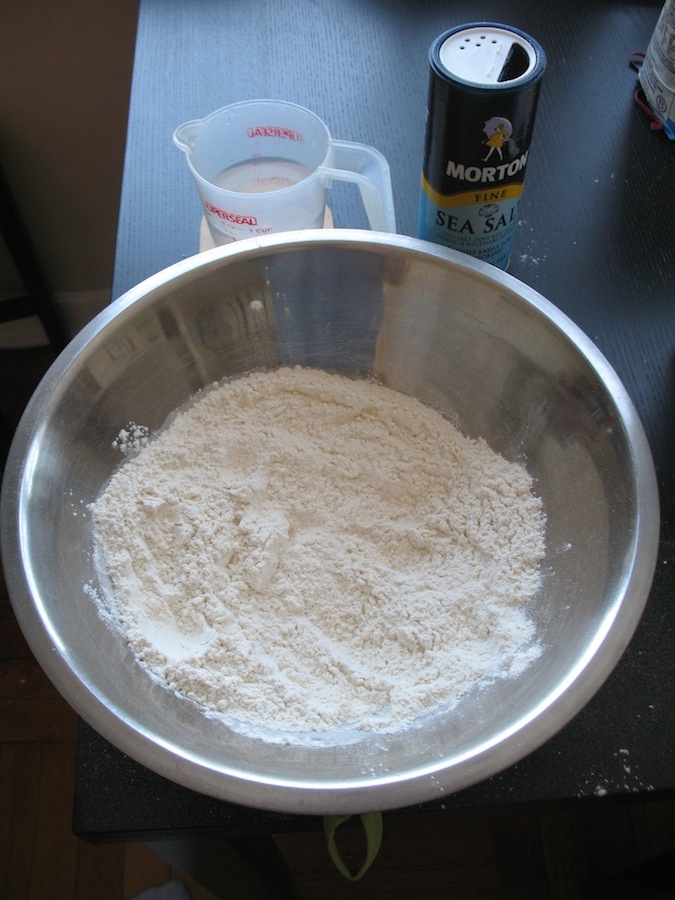
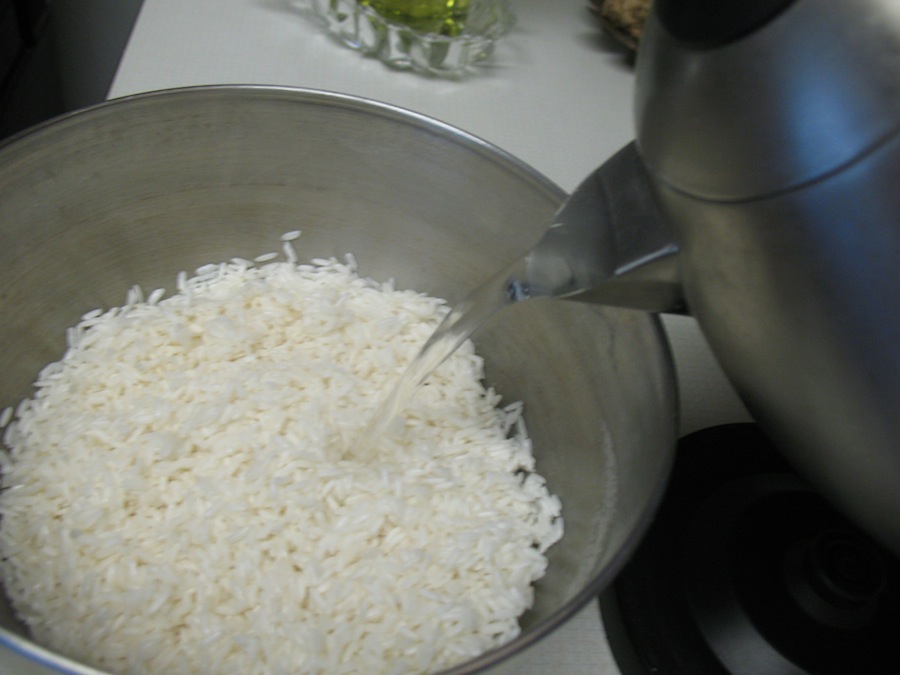
Ingredients for the noodles: 2 cups of all-purpose flour, 2/3rd cup of water, and a half tsp salt. Should be plenty for 2 hungry people.

IMG_2906

After mixing, cover and let rest for 10-15 minutes.

IMG_2914

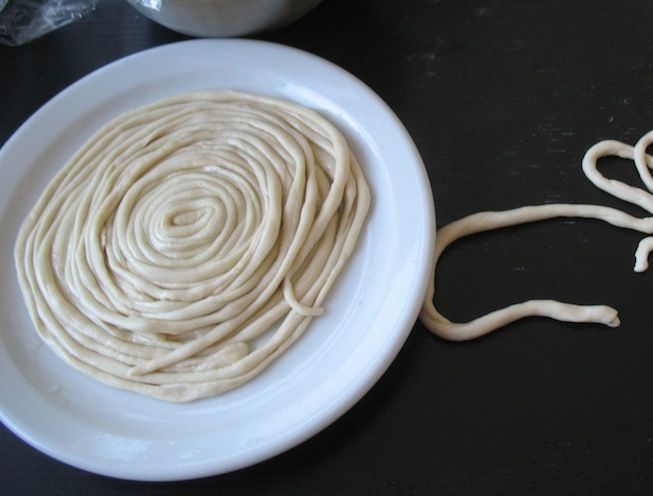
Roll out the dough so you can cut it into strips. These strips will then be rolled into round noodles and coiled onto an oily plate.


Coil noodles and cover with oil to prevent them from sticking and drying out. Let sit for around 20 minutes.

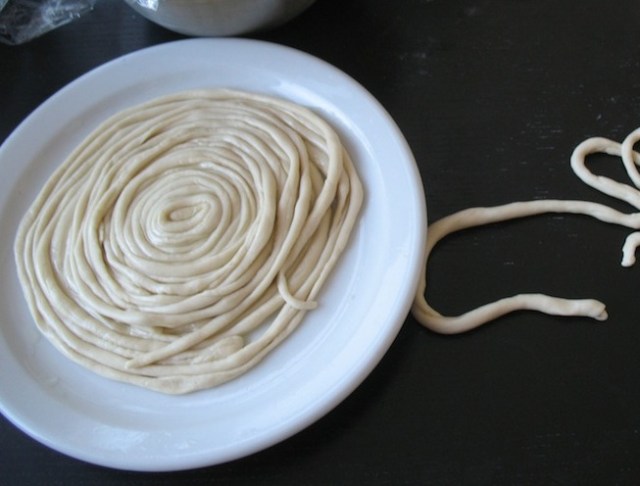
Coil noodles and cover with oil to prevent them from sticking and drying out. Cover and let sit for 20 minutes or so.

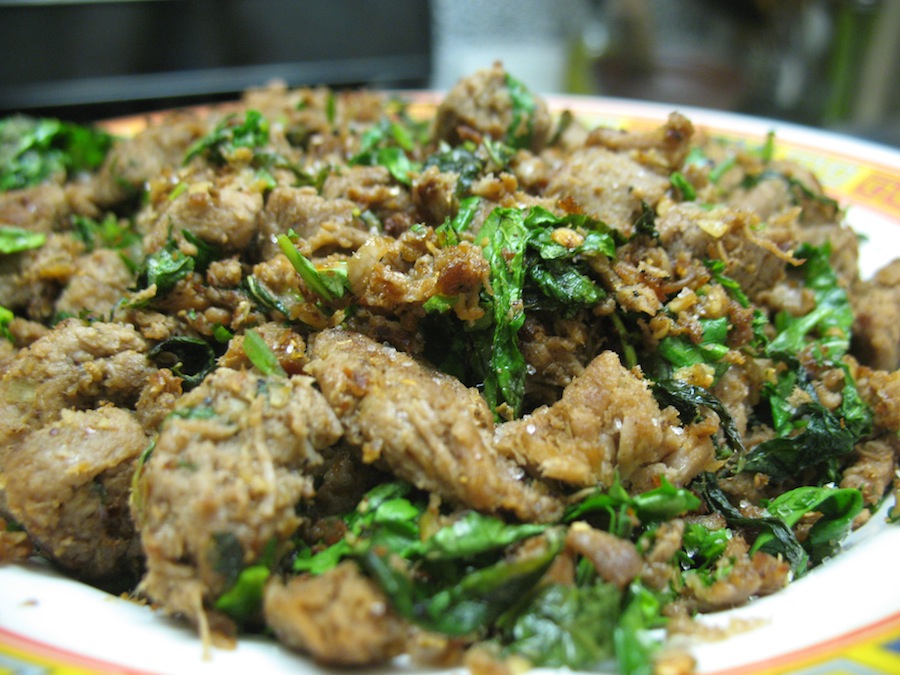
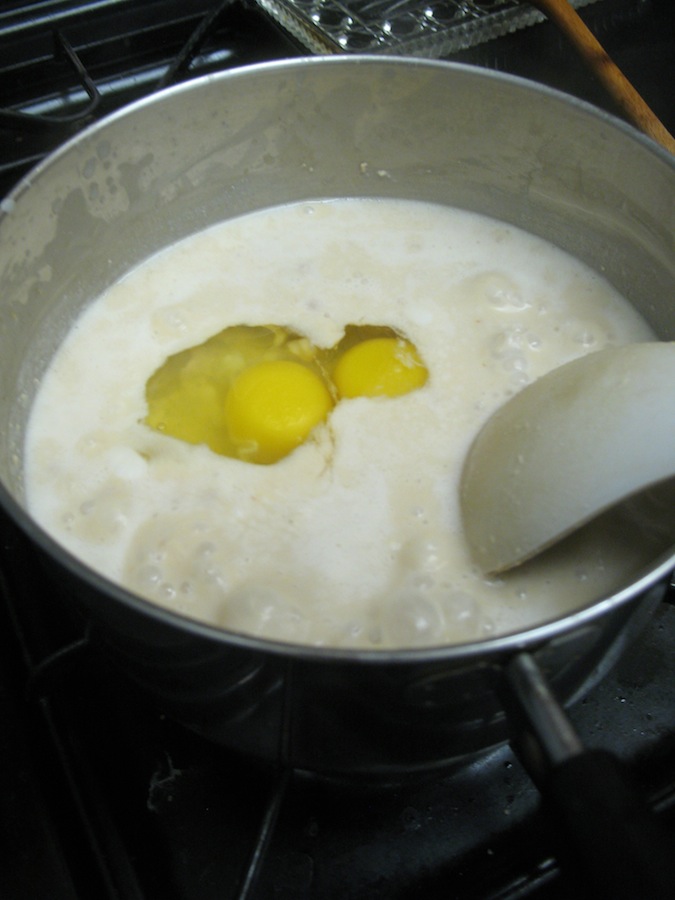
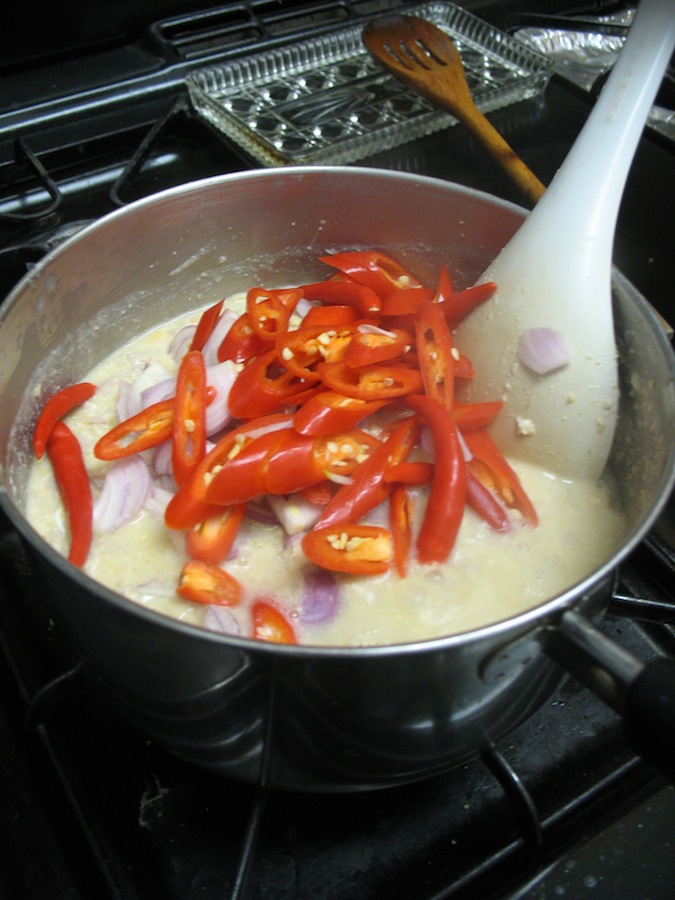
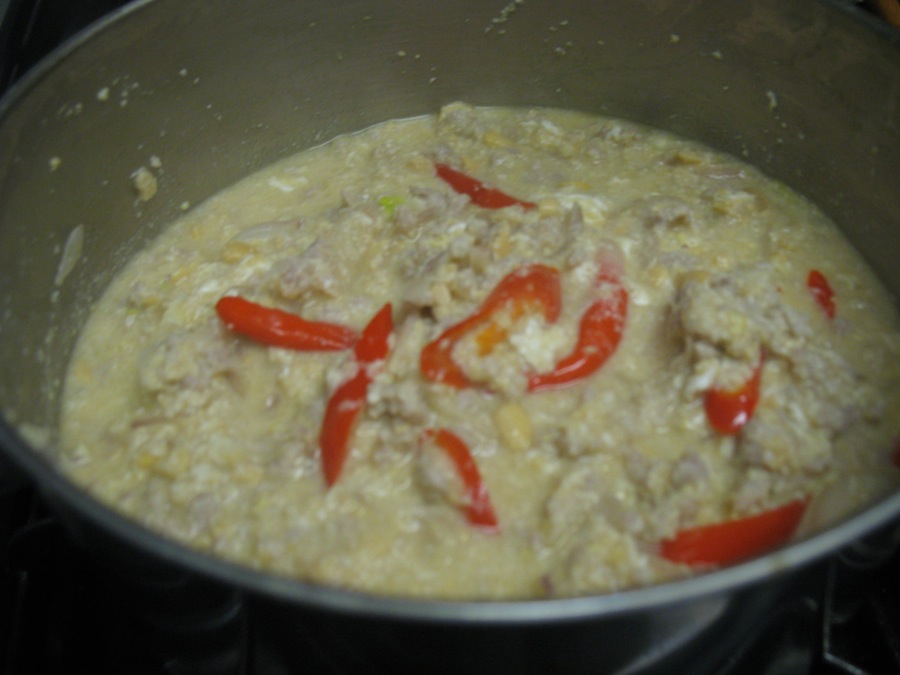
Preparing the topping. While noodle coils are resting, prepare your topping. Fry the mutton, onions, chiles, garlic, veggies, and chopped tomato. Season meat with salt or soy sauce and ground cumin early on in the cooking process. The tomato will tie everything together with a nice faint reddish sauce.

IMG_2873IMG_2879
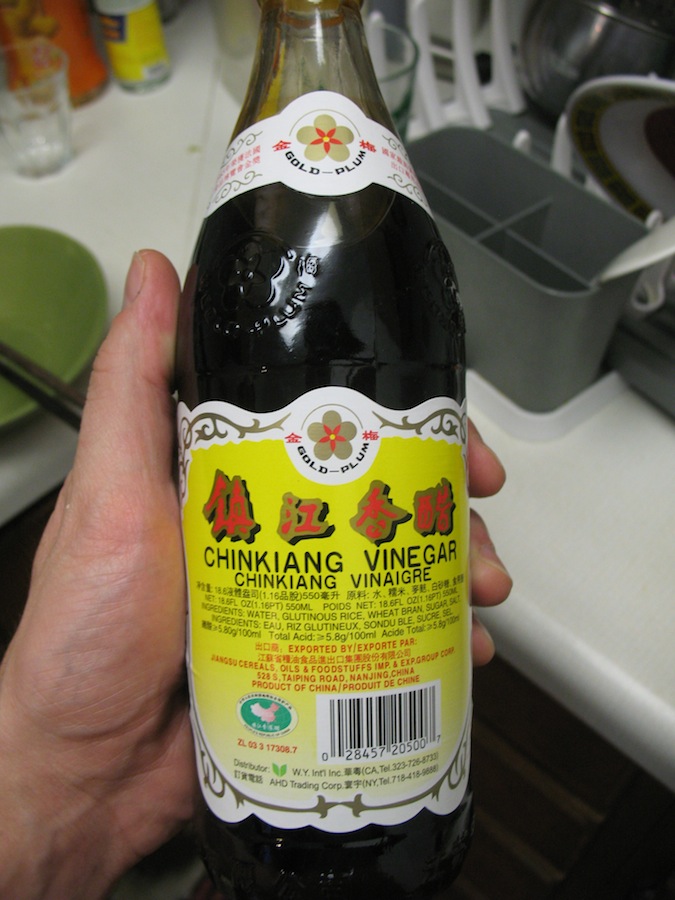
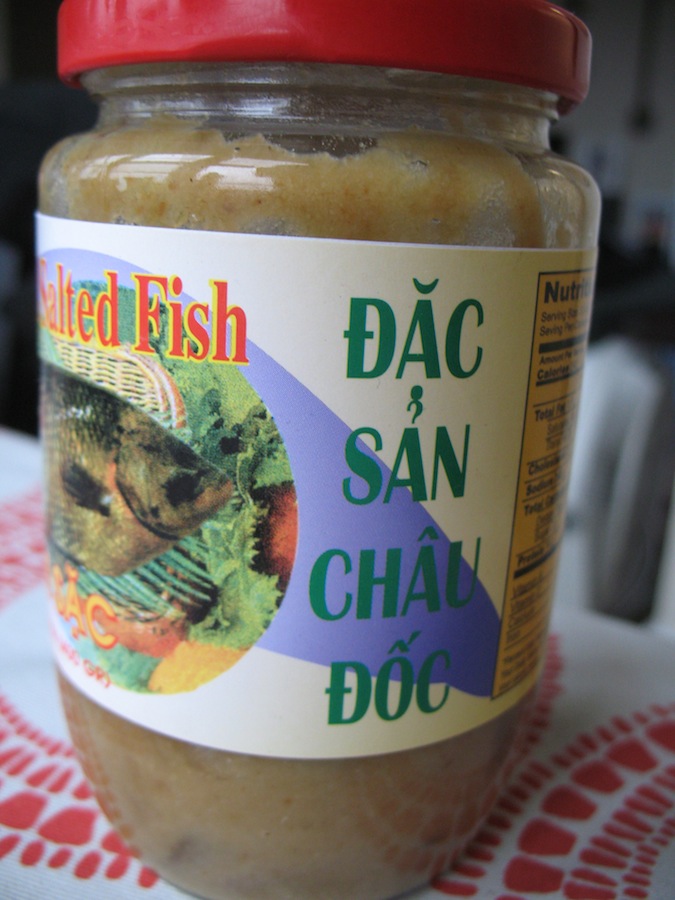
Finish cooking with an optional splash of black rice vinegar (Chinkiang brand–see image to the right).

Take the stir-fry off heat and cover. Now it is time to get back to the noodles. Get a big pot of salted water on the boil. Don’t start pulling noodles until your water is ready and boiling.


Pull each noodle from the coil and thin it out with your fingers to make the noodle more uniform in size and shape. From the coil you will thin the noodle into a separate pile. Each noodle gets its own pile. There was a lot of oil on that plate, and chances are good you won’t need to worry too much about the noodles sticking to each other in their respective piles. A good technique for thinning the noodles is to twist a little as you thin the noodle out. If it breaks, its not the end of the world. Just start a new pile.

You can see my friend thinning noodles in the image up above. If your noodles are still very thick, you might want to thin them a second time, after a short rest. For me today, my noodles were already pretty thin, even during the coiling stage. Thick noodles prepared this way are nice too, but you should still be aiming for something thinner than a pencil, for example.

Finally, grab onto the ends of noodles from various piles and take them up onto your hands, much like you would wind yarn. Pick up as much as you can handle at a time and extend your arms to stretch the noodles one last time and toss them into the pot of boiling water. Immediately get some chopsticks or some other utensil and agitate the noodles as they boil, to prevent them from sticking to each other or to the bottom of the pot.

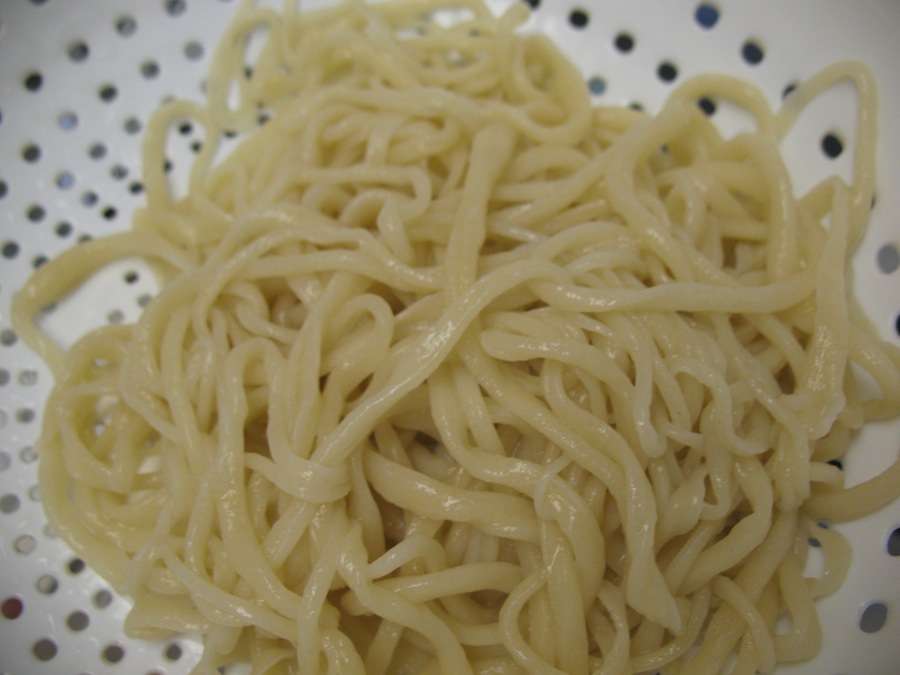
Do not overcook the noodles. Cooking times will depend on how thick they are. Mine were done in about a minute or less. When they float and look like they would be tasty, take them out of the water with chopsticks and/or a strainer. Rinse them in cold water to stop the cooking. If you are eating immediately, rinsing is less important. If you are eating later, rinse to stop the cooking and later refresh them by a quick drop in boiling water again.

IMG_2933
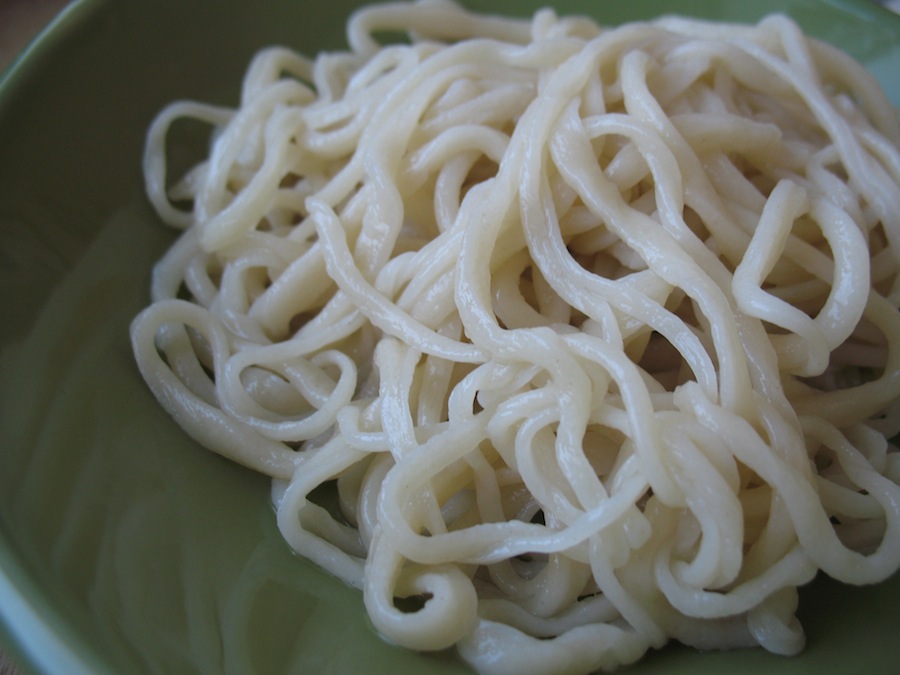
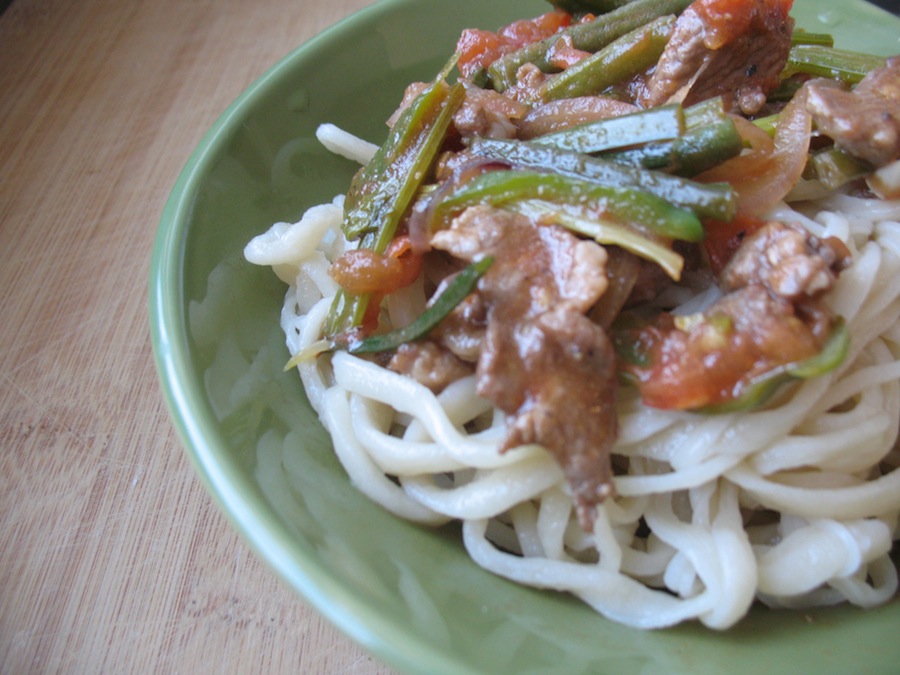
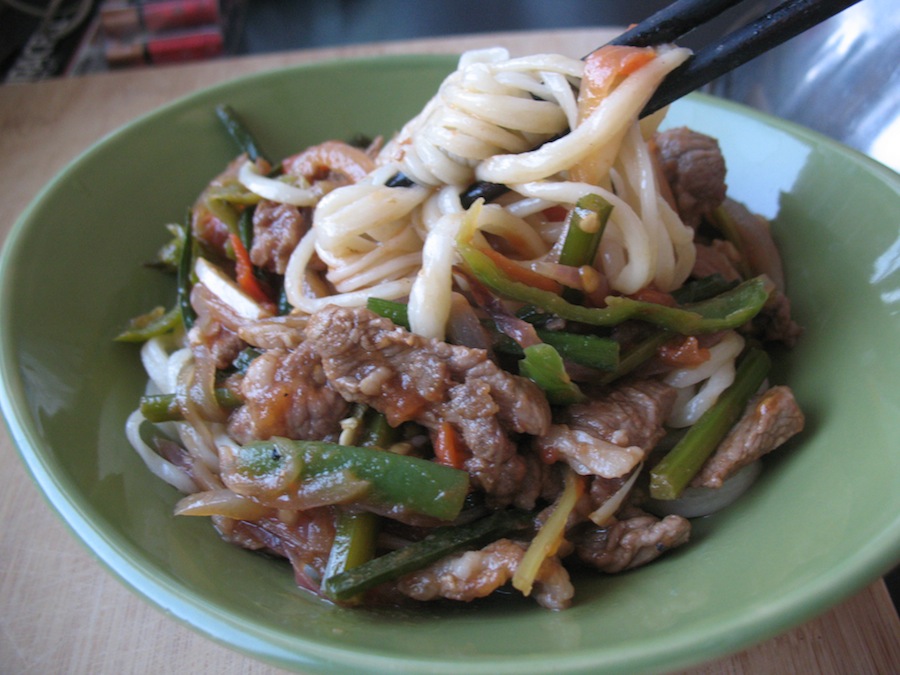
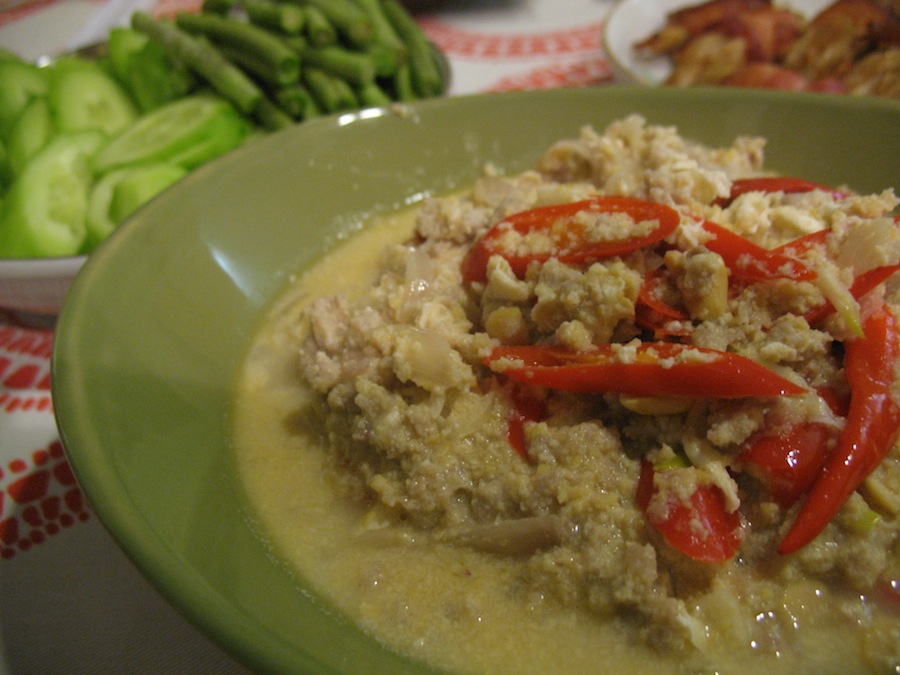
Eat the noodles. Place the cold or warmed noodles in a bowl and top with the stir-fried mutton and tomatoes (and whatever other vegetable-) stir fry. Some people like to add black vinegar at this stage:

IMG_2935IMG_2952IMG_2953

IMG_2945Enjoy!

Posted in - Featured Food Discoveries, - Recipes, Central Asia/Uyghur food | Tagged , , , , , , , , , , | 10 Comments

New feature: Asian Green Vegetable Guide

We all need to eat more green vegetables. In fact, they are an essential part of any meal. Most of my posts tend to revolve around main dishes, often with meat, but at our house we almost always have a green leafy vegetable accompaniment. It’s not only because it is good for us, but because the vegetable flavors and textures pair beautifully with other things.

Fortunately, Philadelphia Asian markets have an amazing abundance of vegetables. The selection is so big however, that it’s kind of hard to get to know what is what–especially when things are not labeled. Beyond that, how do know if you’re going to like them, and how on earth do you cook with them?

I have created the bare-bones of a guide to Asian green vegetables, and that guide can be accessed through the link above “Green Vegetable Guide”. It is not complete by any means, but I expect to add to it over time. I will include vegetable images, ideas of how to cook with it, and where to find it in Philadelphia.

Here are some general hints to help you understand the vegetable section, (which can be confusing!):

  1. Many, if not most Asian vegetable names in English come from Cantonese words. Choy means “leafy vegetable”. Bokchoy means literally “white leafy vegetable” (i.e. cabbage). You will notice that bokchoy‘s range can be pretty large and with many variants, sometime even including Napa cabbage. Choysum means “heart of the vegetable” (i.e. the inner leaves). As you might imagine, the actual vegetable can vary. To make things even more confusing, Chinese dialects have different names for vegetables. In Philadelphia though, most markets that label things use the Cantonese version.
  2. It will seem at first that there is an overwhelming variety of vegetables. Upon closer examination, most of the varieties are actually the same vegetable in different stages of life: baby-size, medium, and large. Small is generally marked with the character for”tips”(苗) or “small” (小), middle size is the normal vegetable name, and large is marked with “big” (大).
  3. Sometimes things are labeled wrong, or things are in the wrong box. It happens.

Enjoy the new feature to the blog!

Posted in - Guides | Tagged , , , , , , , , , | 1 Comment

Sticky rice, a food staple and a key ingredient in Lao-Thai cooking

IMG_2838“Sticky rice? I love sticky rice… I mean, how else can you eat rice with chopsticks?”

I often get this kind of response when I bring up eating “sticky rice”. I quickly see that the person I’m talking to is not thinking of the same delicious staple that I am. Often Americans associate “sticky rice” to the rice that might be found at a typical American-Chinese restaurant, i.e. rice that is clumped together, or in other words, rice that has not been cooked with butter or oil or has been parboiled like Uncle Ben’s.

For anyone who has traveled to Northern and Northeastern Thailand, and/or Laos, “sticky rice”, a direct translation from the Thai or Lao kao niao ข้าวเหนียว/ເຂົ້າຫນຽວ is the primary staple starch accompaniment to the region’s salads, grilled meats, and intensely flavored dips. I already have put up several posts on things to be eaten with sticky rice, for example: green papaya salads, fermented fish dip, prahok pork dip, boiled greens with ribs, sour beef soup, etc.

IMG_2839

Dipping some sticky rice into some namprik (pepper sauce)

Southeast Asian sticky rice is a long-grain glutinous rice that is quite different from standard rices for boiling. Glutinous rices are easy to spot in the market (if they are in clear bags, anyway) due to the opaque white color of the rice (see image below). When looking for Southeast Asian-style sticky rice, look for rice produced in Thailand, often labeled as “sweet rice”:

IMG_2801

click for larger image

IMG_2804


Glutinous rice is also common in East Asia–although the grain is shorter–for special items such as the bamboo leaf-wrapped zongzi 粽子, or the dish popular in Taiwan, youfan 油饭. In Japan it is the key ingredient in the famous mochi 餅 (もち) cakes.

Back to the Southeast Asian staple… in Laos and Thailand people generally steam the rice by suspending it in a basket over boiling water. The finished product is rice that is just gluey enough that it can be manipulated and used to dip to absorb juices, and sturdy enough that it can be used to scoop up food. Needless to say, it is generally eaten with the hands.

If you haven’t tried it, you should. It is excellent with grilled things and salads (essential, in fact). I have only cooked sticky rice in a basket steamer (that can be aquired from any Southeast Asian market), but you can steam it in a regular steamer too. If you plan to use a regular steamer, I’d suggest wrapping the rice in a muslin cloth so that you can flip it to ensure even cooking halfway through.

Here are some images of the cooking process at our house. The basic process is to soak the rice overnight or for several hours, and then steam above water until cooked. You should flip the rice halfway or 3/4 of the way through to ensure even cooking. It is cooked when it looks more translucent and when it is not too hard and it doesn’t get stuck in your teeth:

IMG_2806

steamer, basket and lid. For amount of water, be sure you have enough clearance with the basket that you aren’t boiling the rice on the bottom.

IMG_2824

These are traditional baskets for serving sticky rice, or for toting it out to the field for work. We usually just eat the rice out of the steamer basket though, lazy to clean the carriers.


IMG_2827

This rice has been soaked for 3 hours. If you can’t soak it for at least that long, soak in hot water, and steam it longer.

IMG_2829

This is an optional process we started doing some time ago to ensure a nice consistency in the cooked rice. Drain the soaked rice, and cover with boiling water and soak for about 8 minutes. Meanwhile, get water boiling in the rice steamer (and prepare whatever else you are cooking!)

IMG_2834

Into the rice steamer. Notice the basket has high lips on two sides. This is where you can grip the basket to flip the rice.

IMG_2836

After the rice has been flipped, about 15 or 20 minutes into cooking. Cooking time will depend on how long you soaked your rice and how much rice you are using. This is a few cups. Flipping can take some practice. Use a spatula to help release the rice chunk, take the basket out grasping the two high lips, and use a vertical circular motion to turn the rice upside down

IMG_2838

Cooked sticky rice.

Beyond eating the rice as an accompaniment to food, sticky rice is also prepared as an important ingredient in Lao/Thai cooking.

Kao kua ข้าวคั่ว/ເຂົ້າຂົ້າ is an essential crunchy and nutty addition to laap ลาบ/ລາບ (sour minced meat salads), and steak salad (i.e. “beef waterfall”). This ingredient is easily prepared at home. Most recipes simply instruct you to dry-fry raw unsoaked sticky rice until it is golden brown, and then crush the rice in a mortar and pestle or cut it up in a spice mill. See here for an example of the usual process for making kao kua at padaek.com.

I prepared kao kua by another method recently, following Andy Ricker’s recipe in his Pok Pok cookbook. He suggests soaking the rice first for some hours before dry-frying at very low heat for a very long time. The result is nutty and crunchy. Recently I also used it as a breading on deep-fried filet of sole:

IMG_2779IMG_2786IMG_2788

Kao beua ข้าวเบือ/ເຂົ້າເບືອ is another key use as cooking ingredient (not pictured here). This is used to thicken stews, or to thicken steamed banana-leaf parcels. To make this, simply soak sticky rice for at least 1/2 hour and then pound it in a mortar until ground.

Finally, cooked sticky rice is a common ingredient in fermentation to make delicious and fruity rice wine. I bought some yeast cakes for that purpose, but have yet to have a successful batch. I’ll probably post on that some day if I can get it right.

Posted in - Featured Food Discoveries, - Recipes, Thai/Lao food | Tagged , , , , , , , , , , , , , , | 3 Comments

Spiced and pounded beef salad

IMG_2626Recently I was inspired with a “Kachin pounded beef with herbs” recipe that I found in Naomi Duguid’s giant 2012 cookbook Burma: Rivers of Flavor. The dish was kind of unusual in that beef was boiled, then fried, and then pounded in a mortar with spices, which were a lot like a Northern Thai combination with “Vietnamese mint”, “Sichuan pepper”, chiles, garlic, and ginger.

Usually when I aspire to learn a dish or a genre of cooking, I have a food memory to build on. This time my target was completely imagined. The next thing I generally do is to find as many variants of a recipe as possible, to learn about what is essential to calling the dish by a certain name. In this case, perhaps due to the complex identities of the Kachin State (which is in Northern Burma, along the border with China), and perhaps due to the relative dearth of resources discussing regional Burmese food, there were few examples that I could find in English, or in Burmese (using Kachin and beef as keywords).

After a bit of research, I was able to find two sites that mentioned Kachin food and beef salad. I was not able to find any mention whatsoever of a pounded beef salad though, aside from references to Duguid’s recipe (here is a link to that recipe at SeriousEats). The difference in the other recipes I found online–here with Kachin Traditional Foods Facebook group and a video on how to make the dish called Shan hkat, and here is a link to the Australian channel SBS with a recipe–was that the meat was already minced or ground, and it was mixed with spices and herbs before cooking.

I am choosing to understand this dish as a cousin of the Northern Thai-style laap. Key flavors in this combination were posted previously in the “Vietnamese mint” post. I decided to adapt this beef recipe to include 3 more ingredients, using makhwaen in place of “Sichuan pepper”, a few dipli long peppers, and a scant tsp of kapi crayfish paste.

I’ve prepared this dish a few times already, and both attempts were delicious though looking quite different from the minced meat dishes in the above linked examples. My first example (see top image) was to simply bruise the twice cooked beef (which can be kind of tough) in a mortar and mix it with fresh spices and herbs (i.e. raw). My second example was to pound the beef with herbs and spices before frying again in some oil and finishing it off with a squeeze of lime. Both results were very pleasant, and are delicious with sticky rice and lettuce. Below is a sequence for my second try:

Spiced and pounded beef salad

IMG_2761

Ingredients, minus salt and crayfish paste, clockwise: beef, Vietnamese mint, cilantro, mint, makhwaen (or huajiao), long pepper, garlic, ginger, Thai dried chiles

IMG_2765

toast spices, grind to a powder.

IMG_2766

Add half of this powder to the beef, that is cooking in a little water

IMG_2769

After grinding chile peppers and salt, add the rest of the makhwaen and long pepper, about 2 Tblsp garlic, 1 Tblsp ginger, and 1 tsp kapi (crayfish paste). This will be the spice mix for pounding with the beef.

IMG_2772

Pound small beef cubes with the paste mixture and with 1/2 cup Vietnamese mint and 1/2 cup cilantro and mint. Heat oil in a non-stick pan on medium-high, and lightly brown the pounded beef.

Posted in - Featured Food Discoveries, - Recipes, Myanmar/Burmese food | Tagged , , , , | Leave a comment

More khrok fun: fermented fish and a spicy Isaan dip

My adventures with my granite mortar and pestle (Thai: khrok ครก) continue with a spiced fermented fish dip common in Northeastern Thailand: jaew bong แจ่วบอง

IMG_2709Funky-smelling fermented fishes have already made appearances in previous blog posts focused on Cambodian flavors: here introducing Cambodian prahok, and here with a recipe for fermented fish and pork dip. As with Cambodian cooking, fermented fish holds a very important place in Thai and Lao cooking as well, where it is commonly referred to phlaaraa or balaa ปลาร้า in Thai and badaek ปาแดก/ປາແດກ in Isaan dialect and Lao.

This ingredient, like other fishy items such as fish sauce, are often very off-putting to visitors to Thailand (even from nearby countries). In fact, there are plenty of Thais who find the funkiness of balaa too much to handle. In Thai TV dramas country bumpkins are often depicted as toting around jars of balaa with them wherever they go to the dismay of the “more refined” characters.

If you are courageous enough to spend some time with this ingredient, you’ll come to realize how deep and complex its flavors are, and how key Isaan/Lao dishes like papaya salads, dips, and stews are not quite complete without it.

Finding a good fermented fish in the U.S. can be tricky. In Thailand/Laos, you can find various types of fish fermenting in bins at the market, often in a brown sauce that develops from the fermentation process of salt, fish, and ground rice powder.

In many places throughout Isaan and Laos, locals eat this condiment raw. As you might imagine, liver flukes and other parasites can make a person very, very sick. Cooking balaa before using is definitely necessary.

I’ve found a “preserved salted fish” that works pretty well for a balaa substitute.

IMG_2715IMG_2717

This one is made from gourami (plaa salid ปลาสลิด) fish fillets, as you can see from the fish on the label. This fish’s bones are very fine and brittle, and are easy to eat if you finely chop or pulverize the fish in a mortar and pestle.

To prepare the balaa for cooking, take out several chunks/fillets of gourami and wrap them in a banana leaf packet (banana leaves can be found in most any Asian market freezer section). Roast the packet on a grill, broiler, or in a dry pan on a stove until the outside of the packet is dark and until you can smell the umami-rich fish. To make a sauce, (i.e. for papaya salad) you can also simply boil the fish in a little water in a small pan, mashing it with a fork.

IMG_2703

My broiler packet of fermented fish

After the fish is cooked in this way, chop or grind it up.

Recipe: Spicy fermented fish dipping sauce – Jaew bong แจ่วบอง/​ແຈ່ວ​ບອງ​

Jaew commonly refers to spicy dipping sauces in Isaan and in Laos. They generally have dried or fresh chiles, herbs and spices, often a fermented fish component. Jaew bong is a pretty common one with a base of fermented fish. This dip is tangy, salty, and spicy hot. Here is a link to a very good video from Thailand’s Food Travel TV to help you envision the process.  It is in Thai but the steps and ingredients follow what I have below.

Ingredients:

  • About 2 Tblsp finely chopped lemon grass bottoms
  • About 2 Tblsp sliced shallots
  • About 2 Tblsp roughly chopped garlic
  • About 1 Tblsp roughly chopped galangal root
  • 4-5 kaffir lime leaves
  • About 1/4-1/2 cup balaa, prepared as above
  • 1-2 Tblsp sour tamarind sauce
  • 4-5 green Thai bird’s eye chiles, chopped
  • 2 tsp ground red Thai chile peppers (about 4 peppers)
  • palm sugar and salt (if necessary) to taste

IMG_27121. lightly toast the first 5 ingredients in a dry pan.2. pound these together to a fine paste in mortar and pestle.
3. pound in the balaa.
4. mix/lightly pound chopped green chiles in.
5. fry this finished product in a little oil.
6. add in tamarind sauce, dried red chile flakes, a little palm sugar (and salt if necessary–many fermented fish styles are already very salty).
7. put it in a bowl and eat with blanched or raw veggies and sticky rice.

Posted in - Featured Food Discoveries, - Recipes, Thai/Lao food | Tagged , , , , , , , , , , , , | 5 Comments

Thai basil and green curry with chicken

I have been spending a lot more time with my mortar and pestle, and I am getting better at pounding pastes. Today I had some Thai basil (aka sweet basil, or horapha/holapha โหระพา) and a kaffir lime from our tree on hand, and I decided to make a green curry with chicken.

IMG_2687

Thai basil, or horapha โหระพา

Thai basil is a very common herb at Asian markets in Philadelphia. Unlike more specialized Southeast Asian herbs (holy basil, Vietnamese mint, for example, which are best found at Cambodian and Vietnamese markets), Thai basil can be found at large East Asian markets (i.e. Spring Garden Market, Chinatown’s underground market, Hong Kong Supermarket).

IMG_2682Sometimes this herb is referred to as “sweet basil”. It is not, however, the same as standard Italian “sweet basil”. Thai basil is similar, but it has a sharper, spicier flavor than the Italian kind. If you only have access to Italian basil, they are interchangeable enough that they would still produce delicious results. I’ve used Thai basil in pasta and pizza dishes too. To locate this herb in the Asian market, it is often unlabeled in a tub, or it is pre-sized in clear plastic bags. Notice the purple stems, and the purple stack of flowers.

IMG_2677

Ingredients for green curry spice paste. Clockwise from top: kapi (crayfish paste), lemongrass, salt, galangal root, cilantro roots, shallots, garlic, coriander seed, white peppercorns, cumin, kaffir lime, and bird’s eye chiles

Green curry is, of course, popular and well known in the U.S. The Thai name for the dish is literally “sweet green soup”, and that name hints as to how this is different from other curries popular in Thailand, being sweeter than most. The color comes from the green ingredients: Thai green chiles, lemongrass, kaffir lime peel. The finished dish is not however, extremely green. With coconut milk, the finished product is very light green.

Ingredients for the curry paste are in the image to the left. The trick to a nicely pounded/ground spice paste is the order of grinding. First, toast dry spices, and pound to a fine powder. Then the items from hard to soft: add chopped galangal and finely sliced lemongrass, salt, sliced shallots, roughly chopped garlic, chiles, cilantro, kaffir lime peel, kapi.

We rarely make our own pastes. In Thailand, most people would get paste pre-pounded from a seller at the market. Paste ingredients can vary depending on spice shop, and outside Thailand, spice pastes are most commonly consumed in pre-sized 1/4 cup cans. Recipes in cookbooks and online seem pretty standard. Here are measurements for mine:

  • 10 tiny green chiles
  • 2 Tblsp finely chopped lemongrass bottoms (fragrant parts of about two stalks)
  • 1 tsp coriander roots
  • 1 Tblsp sliced shallots
  • 1 Tblsp coarsely chopped garlic
  • 1 tsp coarsely chopped galangal
  • 1 tsp coriander seed, lightly toasted
  • 1 tsp cumin, lightly toasted
  • 1/2 tsp white peppercorn, lightly toasted
  • 1 tsp coarse salt
  • 1 tsp kapi paste (crayfish paste)
  • 1 tsp or more kaffir lime peel or 4-5 kaffir lime leaves (the peel has more fragrance)

IMG_2678The hard part of this curry recipe is pounding of the paste. Beyond that, it is simple and straightforward. Typical ingredients for the soup (curries are called “soups”) in Thailand are sliced bamboo shoots (I usually used a canned kind, but the whole shoot), golf ball-sized Thai eggplants, halved or quartered (I didn’t have those today), Thai basil leaves, and coconut milk. Chicken or fish is common for meat.

IMG_2689The process is simply to bring coconut milk to boil (I used a 15 oz can), add curry paste and meat. For sugar, the best kind to use is palm sugar. It is usually sold in little 1 Tblsp cup shaped forms. I used two or three tablespoons, first cracked in the mortar and pestle to help it dissolve. Fish sauce is the salt to add, start with a good tablespoon. Then add whatever else you are cooking in terms of vegetables (I used bamboo shoot slices and long red chiles). Add some kaffir lime leaves. Adjust for seasoning.  Add more palm sugar and/or fish sauce. When everything is cooked through and tasting right, dump in the prepared Thai basil leaves (break these off the stem much like the process for making holy basil stir fries).

IMG_2691

Finished product, with Thai basil added. To be eaten with rice and a side of fried kale.

Posted in - Featured Food Discoveries, - Recipes, Thai/Lao food | Tagged , , , , , , , , | 5 Comments

Thai fermented soy beans and sweet coconut and pork dip

IMG_2658

lon dao jiao หลนเต้าเจี้ยว, a dip for vegetables with coconut, pork and fermented bean base

Lon หลน is a genre of Thai meat dips that accompany raw vegetables and fried or roasted fish. It is different from other Thai dips (like the more discussed nam phrik น้ำพริก varieties) in that it uses coconut cream as one of its key flavors. Ground pork is commonly used as a key meat ingredient, and some chop crayfish, shrimp, or crab meat as part of the meat mix too.

Fermented "white beans", or tao jiao kao เต้าเจี้ยวขาว from Chai Hong market on 7th St

Fermented “white beans”, or dao jiao kao เต้าเจี้ยวขาว from Chai Hong market on 7th St

A previous post already discussed a meat dip that is also considered lon in Thailand: prahok katii from our local Cambodian market. Today I’ll introduce another ground pork lon, but this time instead of a fermented fish base (prahok in Khmer, plaraa in Thai) like was used in that dish we will use Thai fermented soy beans, or “white beans”, and tamarind.

The use of these beans is similar to a previously discussed item, “Thai rotten bean sheets”, which are common in northern Thailand, Laos and Burma. The bean flavor is also very similar to the chunky liquid bean paste also cited in that post.

IMG_2635

Thai fermented soybeans, getting ready to use in the dip

This week my mother-in-law is visiting us in Philadelphia, all the way from Isaan.  She is showing us how a proper lon is done. The key flavors include today’s showcased bean ingredient, coconut cream (the kind used for cooking curries), palm sugar, and tamarind.

Other research from this came from recipes found in a cookbook from 1966 Everyday Siamese Dishes that I found some months ago at a cookbook store in Manhattan.


Recipe:  “Lon” of fermented beans and ground pork – Lon dao jiao muu sap หลนเต้าเจี้ยวมูสับ

Ingredients:

  • about a pound of ground pork
  • 1/2 a jar of fermented soybeans (see jar above)
  • 1/2 a can of coconut milk or cream (the kind used for cooking curries–about a cup)
  • 3-4 Tbsp of palm sugar
  • 2-3 long (i.e. not very spicy) chiles, coarsely chopped in large chunks
  • 2-3 Thai bird’s eye chiles, halved
  • scant cup of sliced Asian shallots
  • 3 Tbsp prepared tamarind sauce
  • 2 eggs
  • fish sauce to taste

IMG_26391. Prepare beans by rinsing. Ours were pretty salty, so they needed a good rinse. We used about 1/2 the jar of beans. Beans should be then coarsely mashed. Some Thais use a mortar and pestle for this, we used an immersion blender. We blended about 2/3 of the beans and added the rest whole.

Note: some recipes mash the beans together with the meat of choice. We didn’t do that today.

2. Boil about a cup of coconut cream. Add in the soybeans and boil.IMG_26413.  After the soy bean paste boils, add meat(s). Add palm sugar and tamarind sauce.  See previous post for how to prepare tamarind.  Add eggs and beat them into the mix.

IMG_26434. Add in shallots and chiles. Taste for final seasonings, add more sugar, fish sauce, and/or tamarind if it isn’t sweet/salty/sour enough.

IMG_2647IMG_26495. After the shallots have been in long enough to take of the rawness, serve with raw veggies.  We had sliced cucumbers and long beans (and pan fried bacon-wrapped enoki mushrooms):

IMG_2654

Posted in - Featured Food Discoveries, - Recipes, Thai/Lao food | Tagged , , , , , | Leave a comment

Tamarind pods, sweet and sour, and a sour soup with green papaya and salmon

IMG_2525

Thai tamarind pods from the market, sour (top) and sweet (bottom)

Tamarind (or tamr hind “Indian date”–in other words, long cultivated throughout South Asia) is a key souring agent used in Southeast Asian cooking. I touched on this ingredient briefly in a prior post on Three essential Cambodian flavors. In that post I used a compressed block of sour tamarind. Today (and due to its impressive result, from now on) I’m taking another step back in the production chain to go directly to the dried fruit, for snacking, and also for making sour tamarind juice for cooking.

The name for tamarind in Thai and Lao is makhaam มะขาม/ໝາກຂາມ, and it is called ampil អម្ពិល in Khmer. The fruit is alien-looking and fibrous, but it is highly nutritious and delicious. Being the miracle fruit that it is, it has a laxative property similar to prune, and it can even be used to polish brass (here is a video on an example of that).

Most Asian markets in town sell some sort of tamarind for cooking with, whether it be in compressed block form, in Thai known as makhaam biak มะขามเปียก (“wet tamarind”), tamarind concentrate sauce, and even as an instant powder from Knorr.

Two types of tamarind, sweet (left) and sour (right)

Two types of tamarind, sweet (left) and sour (right)

The whole fruit can also be found at many Asian markets (the larger ones are likely to have them), from Chinatown to H-Mart. You can find them in brightly colored boxes, usually in the produce section. These are likely tamarind from Thailand, but tamarind from Mexico can also be found at large grocery stores in Philadelphia. I don’t know how sour the Mexican variety are in comparison to what I’ve got here today.

Cracking open a sweet tamarind pod

Cracking open a sweet tamarind pod

Thailand’s tamarind trees have different species.  Two of those are showcased here, marketed as “sweet” and “sour”. Both are ripened fruits, can be enjoyed on their own as a snack.  I’d say that sweet tamarind would appeal to most tastes. Sweet and gummy. The sour variety however, would appeal only to those who really love sour gummy candies (like Sour Patch Kids, Sour Punch Straws, etc). Sour tamarind is even more sour than mainstream sour candy. It’s quite a punch.

Shelled tamarind, sweet (left) and sour (right)

Shelled tamarind, sweet (left) and sour (right)

This punchy sour tamarind is the one to use for cooking. When it is combined with savory flavors of fish sauce and palm sugar, it provides a fascinating new level of flavor. In Thai, Lao, and Cambodian cooking, sour tamarind is prepared by being made into a sauce prior to cooking. It is great in soups (like the one below or the Cambodian sour beef soup mentioned previously), and in salads (like papaya salad for example).  It is also a key ingredient in dishes famous in the U.S.: Pad Thai and “tamarind shrimp”. To make a sauce concentrate from the fruit, here is a step by step process:

IMG_2583

Shell some sour pods, 2-3 generally for a dish

IMG_2586

Cover with a little boiling water and agitate the fruit by poking it with a fork. Cover and let sit for 10-15 minutes

IMG_2587

Mash it some more with a fork. Then, take a spoon and take only the thick juice leaving seeds, veins, etc


Recipe: Sour soup with green papaya and fried salmon (Gaeng som malagau plaa salmon) แกงส้มมะละกอปลาแซลมอน

This is a great soup from Central and Southern Thailand, and I find it to be a treat on a cool fall day. The key flavors in this soup are sour tamarind juice (see above), heat from chiles, and a slight medicinal flavor from what is generally referred to as “rhizome”. Most vegetables would be good in this soup, classic pairs are green papaya, napa cabbage, cauliflower, bamboo shoots.

IMG_2602

Ingredients for the soup paste (minus a tsp of crayfish paste, off camera), and about a tsp of salt, clockwise: shallots, galanga, goat chile (I used New Mexico chile in its place), small Thai dried chiles, garlic, rhizome.

1. Make soup paste with about 3 shallots, 3 cloves garlic, 2 fingers of rhizome (I used frozen kind), small piece of galangal, 6 Thai dried chiles, 3 goat chiles or 1 large New Mexico chile (soaking this helps break the skin), 1 tsp each of salt, and kapi (crayfish paste).

IMG_2603

Red red paste, getting ready to put into boiling water

2. Take about a pound of a fish that won’t flake too easy (I’m using salmon today). slice tall 1/2 inch slices. Pan fry on medium high to make some crust. As you can see I left skin on:

IMG_2612

my fried salmon pieces

IMG_2590

green papaya, halved.

3. Boil 5 cups of water in a pot. Add in the soup paste. Season with about 1/4-1/3 cup of tamarind water, 1-1 1/2 Tblsp palm sugar (I usually crush mine first in my mortar and pestle), and fish sauce to taste.  Should be salty, sour, little sweet.

4. chop veggies to go into the soup. We used leftover green papaya and some cauliflower florets. Things can be rustic.

IMG_2593

quartered and chopped green papaya

5. Boil soup until veggies are cooked. Papaya is cooked when it is nearly translucent, similar to daikon.

IMG_2610

Veggies just about cooked

6. When veggies are cooked, readjust for flavors. Add fish sauce and tamarind if necessary. Finally, mix in the fried fish. Serve.

IMG_2615

IMG_2621

plated and ready to eat with rice. we also had fried watercress (off camera)

Posted in - Featured Food Discoveries, - Recipes, Thai/Lao food | Tagged , , , , , , , , , , , , , , , , , , | 8 Comments

“Vietnamese mint” and a Northern Thai “soupy salad” with chicken

In most Southeast Asian markets in Philly (i.e. Cambodian, Vietnamese markets of North and South Philly, as well as the 3 large markets on Washington Ave) you can find the very tasty herb pictured below. It has a very unique flavor, and it is not replaceable. In English it is most commonly called “Vietnamese mint”, but it might be called “lady thumb” or “Vietnamese coriander”. In Philadelphia markets it might be labeled with Vietnamese or Chinese: Rau răm, or 越南香菜. In Thailand and Laos the herb is called phak paew or phak fai ผักแพว/ຜັກແພວ (ผักไผ่/ຜັກໄຝ). The leaf can be used in a number of preparations, including as a raw accompaniment to salads and dips.

A plate of "Vietnamese mint"

A plate of “Vietnamese mint”

When looking for this herb, which might not be labeled at all, look for the long skinny leaves that are dark on top and light on the bottom. Above and below are some images to help you identify it. IMG_2551This is a wonderful addition to Vietnamese spring rolls (the kind with rice paper wrapped around fresh herbs). It is also delicious in soup like the one highlighted below.


Recipe: Sour Chicken “salad” (or soup) Yam jin gai ยำจิ้นไก่

This dish is sometimes described (and manifested) as a salad, and sometimes it is a soup. If you browse the internet for images of this dish, you’ll see what I mean. “Yam” (pronounced “yum”) is generally a genre of mixed sour salads in Thai, but in this case it is more of a soupy salad. The flavors of this dish are very unique to Northern Thailand. Anyone who has explored food there will attest, flavors are totally different from other parts of Thailand.

In addition to “Vietnamese mint” here are some images of other key items that lend unique Northern Thai flavors to this dish, specifically two items discussed in previous posts, dipli and makhwaen:

dipli or "long peppers"

Dipli or “long peppers”

Makhwaen, relative of "Sichuan peppercorn"

Makhwaen, relative of “Sichuan peppercorn”

cilantro roots (available at many mainstream groceries these days)

cilantro with roots (available at many mainstream groceries these days)

makrut leaves

makrut leaves

"sawtooth herb" or "sawtooth coriander"

“sawtooth herb” or “sawtooth coriander”

5 shallots are going in the mix too, along with these ingredients

shallots are going in the mix too, along fermented crayfish paste and garlic


Our past attempts at this dish were more like salads, using Northern-style namprik laab (minced meat) spice mixes that we brought with us from Chiangmai. This time, I wanted to try making this from all fresh spices. This time I mostly followed Andy Ricker‘s recipe. The result was delicious, though a little less spicy than the ready-made spice mix:

1. Make a paste with coriander seeds and the above dipli, makhwaen, dried Thai chiles, salt, fermented crayfish paste (kapi) and Thai fermented fish.

2. Boil a chicken (I used a 2 lb “old chicken” from Hong Kong market (North Philly)), spice the broth with lemongrass, kapi, galangal slices, and cilantro roots (see above).

3. Shred that chicken by hand, toss the bones. Boil some of that strained broth with the shredded chicken and the paste from step 1, along with roughly chopped lemongrass, galangal, shallots, kaffir lime leaves, and salt.

herbs just added, and heat just turned off.

herbs just added, and heat just turned off.

4. When the flavors are properly mixed, taste for saltiness. Dump in equal parts of the following roughly chopped herbs: Vietnamese mint (I just separated leaves from stem), sawtooth coriander, cilantro, and dill. Turn the heat off, soup and salad are served.

IMG_2580

Soup/salad is served!

Posted in - Featured Food Discoveries, - Recipes, Thai/Lao food | Tagged , , , , , , | 6 Comments